Discovery & Analysis
Discovery & Analysis is the default project mode. nori works in two phases: it first indexes your codebase into a local Wiki, then evaluates your compliance policy against that curated context. For how the two-phase pipeline works under the hood, see Architecture.
In this mode the Wiki must be built before controls can be evaluated — the analysis draws on the indexed knowledge base as its evidence. Build (or refresh) the Wiki first, then run the analysis.
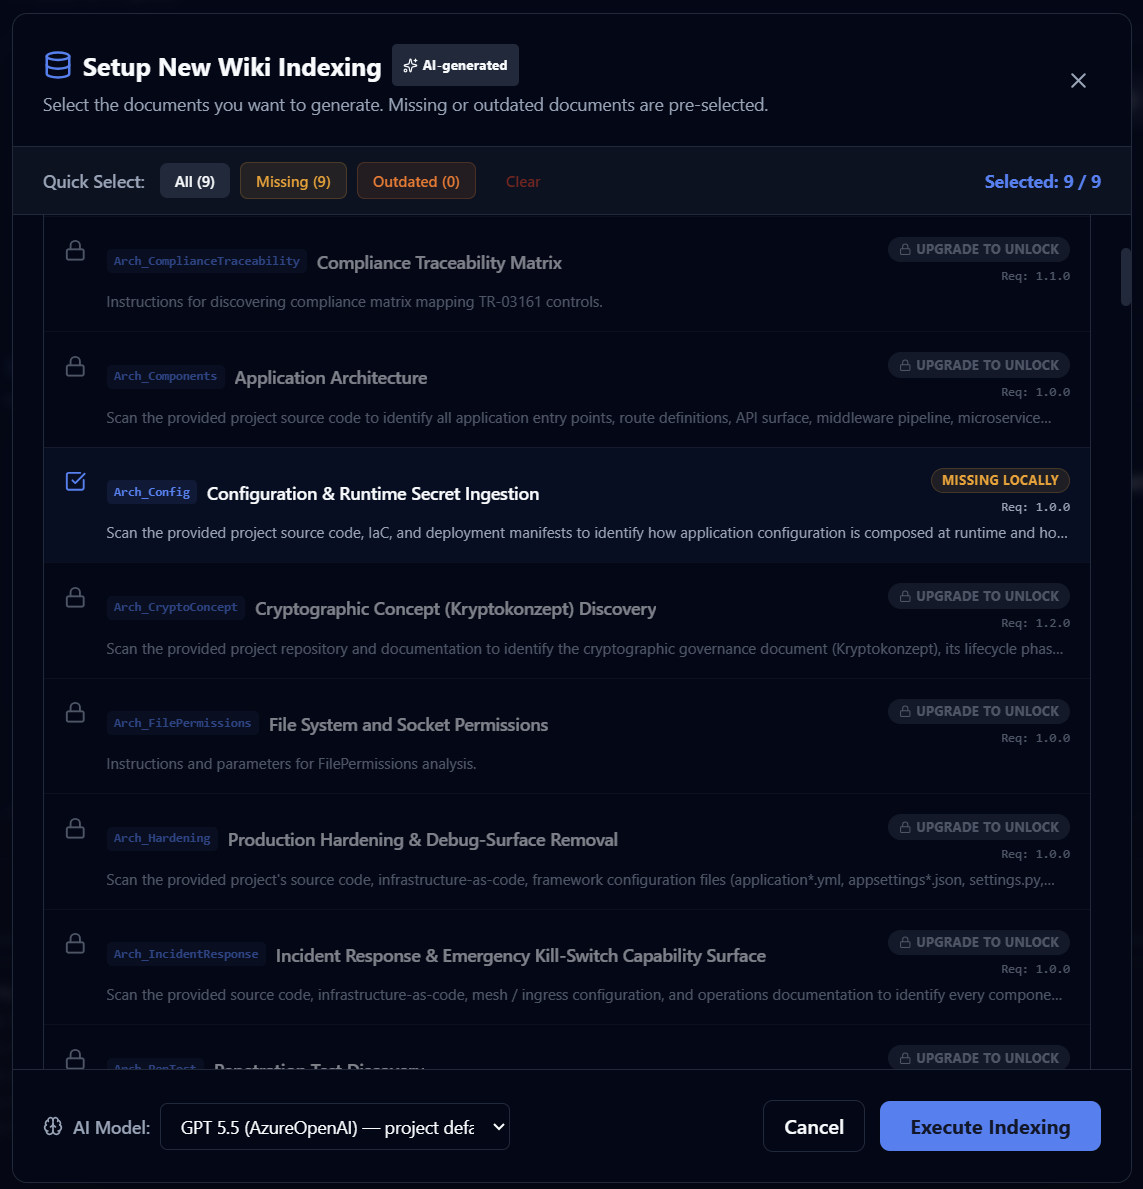
1. Index the codebase (build the Wiki)
This step is required before any controls can run. Click Run New Indexing on the Wiki tab to build the local wiki topics for your codebase; indexing runs are tracked under Indexing History. Once the Wiki is in place, its context is injected into the control evaluations in the next step.
You can enable the Concise setting for wiki generation. This instructs the indexer to generate shorter, fact-dense wiki pages, capping verbosity. Because wiki content is injected into downstream control evaluations, generating concise wikis drastically reduces overall analysis token costs.
2. (Optional) Tune the analysis
Before you run, you can adjust behaviour under Project Settings → AI & Analysis Config ("Adjust inference models and scanning logic"):
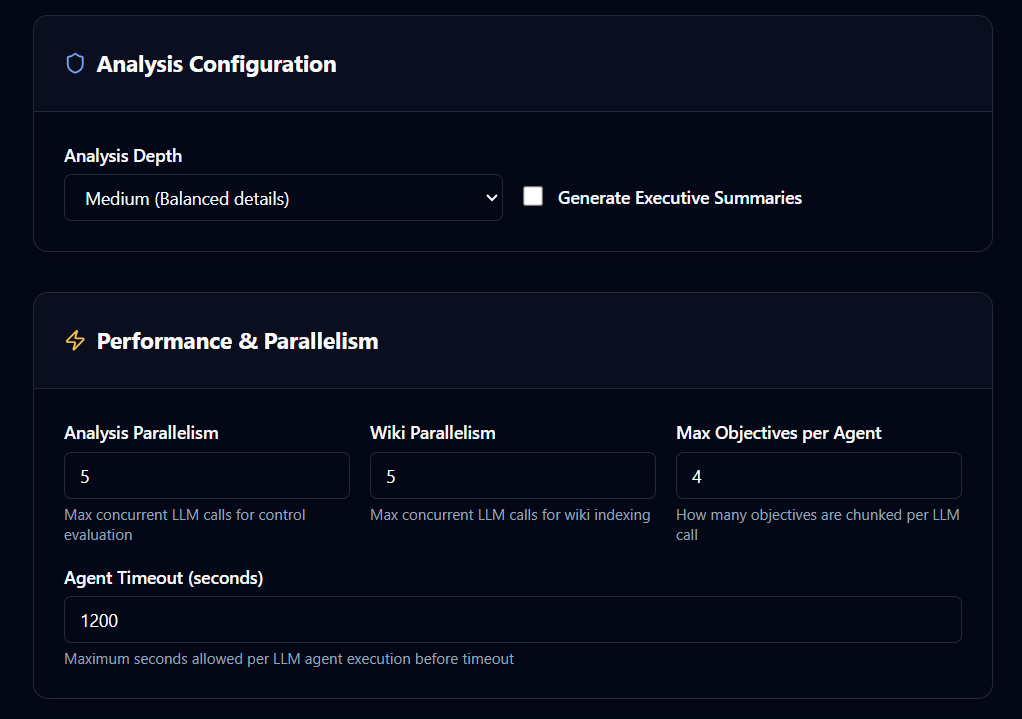
- Analysis Depth —
Light (Surface-level scan),Medium (Balanced details), orExtreme (Deep semantic traces). - Generate Executive Summaries — produce a high-level summary alongside the findings.
- Performance & Parallelism — Analysis Parallelism (max concurrent LLM calls for control evaluation), Wiki Parallelism, Max Objectives per Agent, and Agent Timeout (seconds).
- Budget Limits (Claude CLI) — Analysis Max Budget (USD) and Wiki Max Budget (USD) set per-agent spending caps; leave empty to disable the cap.
- Resumability & Optimization — Skip Existing (Analysis) ("Resume runs by skipping already-evaluated controls"), Skip Existing (Wiki), and Compress Wiki Context ("Reduce input tokens by ~50% on prose-heavy wiki content").
3. Run the analysis
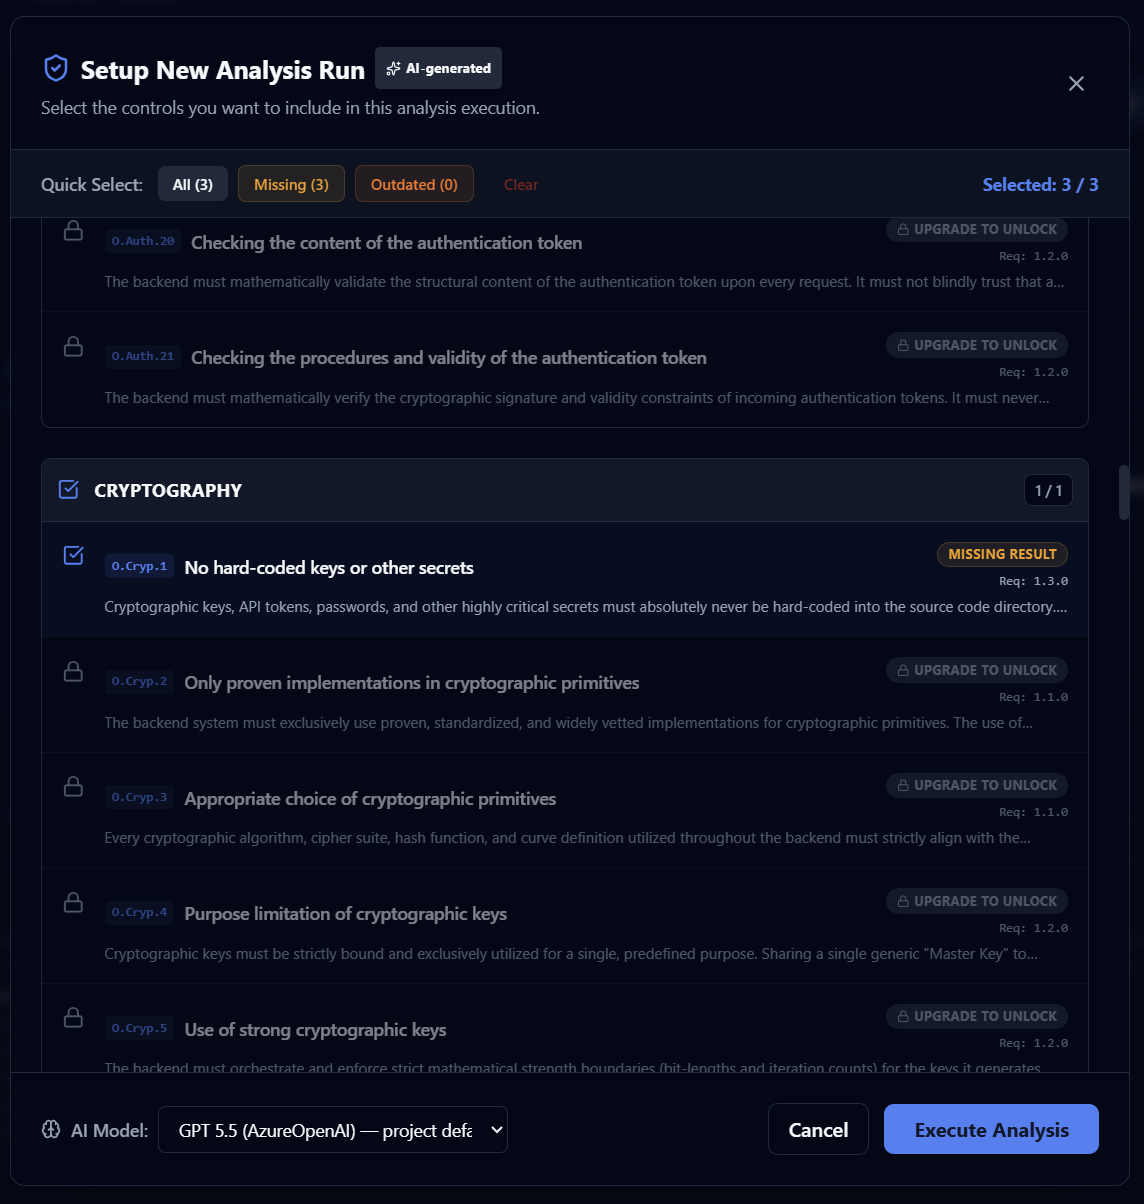
With the Wiki built, open the project and, from the project header, click Run New Analysis. In the configuration modal that appears, you can customize the run options or select a different AI model just for this run (overriding the default project models).
Once started, nori dispatches a bounded sub-agent per control and evaluates your source code against the selected policy, using the indexed Wiki as context. Progress streams live on the Controls tab as each control executes.
The project dashboard organizes everything into tabs: General, Controls, Wiki (Files), Evidence, and Configuration. Past runs are listed under Analysis History.
Add external evidence
Some controls need proof that isn't in your source code. You can attach documents and index them for use during analysis — see External Evidence.
When your run finishes, continue to Review Results.